Flash Project 1:
Creating Animations
Before beginning the tasks in this project, create a new folder in your home directory, naming it Lastname Project 1.
Task 1 - Using Ease in a Motion Tween
- motionEase.fla Right-click the link at the right and choose Save Target as.... Save into your Project 1 folder with your lastname in front of the filename. Then open the file in Flash.
- Move a car to the stop sign:
- Create a new layer at the top of the stack, naming it Car.
- Add frames to all three layers in frame 45. Lock the bottom two layers.
- Open the library and drag the redcar symbol to the Stage. Place it just outside the lower right, at the beginning of the road, but not yet showing on the main Stage. Use the Free Transform tool to angle the symbol instance in the correct direction on the road.
- Click in frame 21 and add a blank keyframe.
- Add a Motion Tween to the first range of cells. In frame 20, move the car to the stop line, rotating as needed to place it correctly on the road.
- Select the motion tween and adjust the curve to make the car move smoothly along the road.
- Move the car away from the stop sign:
- Select the car in frame 20, copy, and paste in place in frame 21. Adjust the rotation if necessary.
- Add a Motion Tween. Then in frame 40, move the car to the upper left end of the road, just off stage
- Adjust the curve of the motion tween to complete the car's movement along the road.
- Test your movie - well, that can;t be right, the car does not stop...
- Add Ease to control the car's movement:
- On the timeline select the first motion tween. Open the Properties panel if necessary, and click the arrow beside Ease to open that section of the panel.
- Place the pointer over the zero ease value, and drag to the right to the maximum value - 100; "out" will appear to the right side of the value.
- Now select the second motion tween. Drag the ease value to the left as far as it will go. The result will be 'Ease: 100 in'.
- Test your movie again.
- Make any adjustments you feel are needed, and when you are satisfied, save, publish and close.
Task 2 - Create a Moving Frame-by-Frame Animation movingAnimation.swf
- Click this link to view the simple animation you will make:
- Start a new Flash file (2.0 or 3.0, it does not matter). Save the file in your Project 1 folder as lastname movingAnimation.fla.
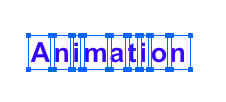
- Select the Text tool. Choose a font and a largish font size. Increase the character spacing.
- Type a text object Animation, and break it apart. Change the colors of the letters as you wish.

- Move the text to just off the right side of the Stage, and arrange them letters into a snaking arrangment, similar to the illustration at the right.
- Add a keyframe in frame 2.
-
 Move the letters to the left 20-30 pixels and move some letters up and others down 8-12 pixels, to look like they are beginning to 'snake' along. Move the letters to the left 20-30 pixels and move some letters up and others down 8-12 pixels, to look like they are beginning to 'snake' along.

- Add another key frame in frame 3, and move the letters to the left the same amount as before, then rearrange again, moving letters up or down the same number of pixels as before.
 
- On the bottom of the timeline, locate and click the Onion Skin button.
You will see a set of brackets appear at the top of the timeline. The current frame appears in normal colors and brightness, and the neighboring frames inside the brackets show as ghost images.
- Continue to add key frames and snake the letters across the screen.
.
- Save your work and test the movie (Ctrl + Enter).
- Make any adjustments you feel are needed. You may want to adjust the frame rate if the animation seems too fast or too slow.
- Save and Publish your movie when you are satisfied with the results.
Task 3 - Create a Shining Sun Growing a Flower
Often, you want to have an object change from one simple shape to another. In this case, a shape tween is used. Note that you can only create shape tweens with objects, not with symbols.
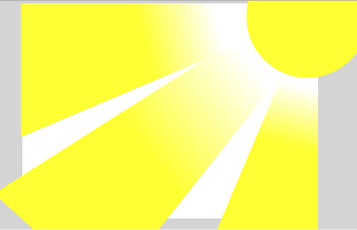
- sunGrow.swfClick the link at the right to see an example of this animation.
- Create a new Flash document. Save in your Practice 4 folder as lastname sunGrow.fla.
- Draw the animation objects:
- Name the existing layer Sun.
- Select the Oval tool. Change the fill color to a sunny yellow and stroke to none.
- Place your mouse pointer over the upper right corner of the Stage, hold Alt and Shift, and then drag to create a circle about 180 pixels in size.

- Create a new layer. Draw a rectangle, using any color and no stroke, approximating its size to the top shape in the illustration at the right. Then use the Subselect tool and/or the Free Transform tool to change it to the shape as shown. Place it along the top edge of the Stage.
- Copy and paste the shape, dragging it away from the original so they do not merge. Flip it vertically and rotate it 90 degrees, then place it as shown to become the shape along the right edge of the Stage.
- Create one more rectangle and transform it to become the center ray, placing it as in the illustration.
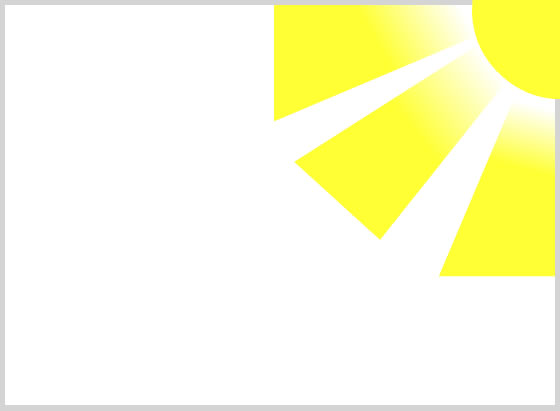
- Open the Color panel if necessary, and create a linear gradient shading from white to the bright yellow of the sun. Apply the gradient to each ray, then use the Gradient Transform tool to adjust the gradients to look similar to the illustration at the right.
- Select the three rays and distribute them to layers. Name the three new layers Ray1, Ray2, and Ray3.
- Right-click the now-empty layer and choose Properties. Change it to a folder by clicking the button in the dialog box. Rename the folder Rays.
- Drag the three Ray layers to be in the Rays folder, then click to close the folder.
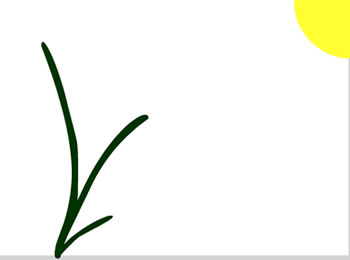
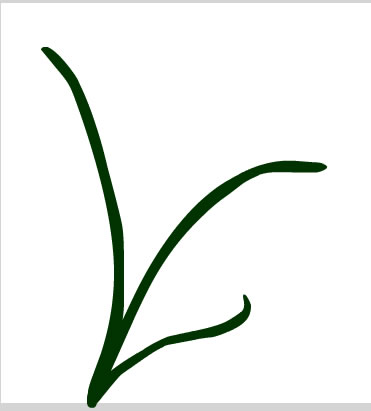
- Above the sun layer, create three new layers. Name them Stem1, Stem2 and Stem3. On each of the three layers, use the brush tool to draw one of the three stems.
- Create a new layer folder above the first stem layer, naming it Stems. Drag each of the stems to be in the folder, then click to close the folder.
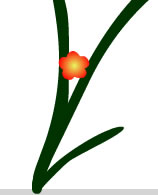
- Above the Stems folder, create a new layer and name it Flower.
- Draw a small flower of some kind and make a radial gradient for its fill.
- Animate the objects:
- Open the Stem and Ray folders. Select frame 10 in all layers, and add a blank keyframe.
- Copy the artwork from frame 1 of each layer to frame 10 of its same layer.
- Close the Stems folder. Hide the Stems folder and the Flower layer.
- Add a keyframe in frame 25 of the Sun layer.
- Select the sun object and use the Free Transform tool, again holding Alt and Shift, to increase the size of the sun in frame 25.
 Add a Shape Tween to the space between the the two keyframes. Add a Shape Tween to the space between the the two keyframes.- Hide the Sun layer.
- In the three Ray layers, add a keyframe in frame 45.
- In each layer, select the shape in frame 45 with the Free Transform tool, and drag a corner handle to increase the size of the shape until its edges extend completely off the Stage. Add a motion tween for each.
- Turn the sun layer back on and test the movie.
- Close the Rays folder and then hide the Rays folder and Sun layer. Open the Stem folder and select frame 10 in all three stem layers. Drag the frames to frame 25.
- In all three layers, add a keyframe in frame 55.
- Add some length and shape change to each stem shape, to indicate growth.
- Add a shape tween to each.
- Test the movie to see if the stems grow smoothly. Make any adjustment needed.
- Close the Stems folder. Unhide the Flower layer.
 Select the frame containing the flower artwork, and drag the frame to frame 35 on the same layer. Select the frame containing the flower artwork, and drag the frame to frame 35 on the same layer.- Create a keyframe in frame 55.
- In frame 55, increase the size of the flower from the center, then reshape it to make it look like a more mature flower.
- Add a motion tween.
- Test your movie to see if the flower grows smoothly. Make any adjustment needed.
- Unhide all layers and folders. Test the movie.
- Select frame 80 in all layers. Add frames to extend the movie. Test again to see the difference.
- When you are satisfied with your work, save your animation file and publish the movie. Close the file.
Task 4 - Working with a Text Morph and Shape Hints
Sometimes, the shapes you want to tween to and from are more complex. The tween may not move smoothly or attractively. In this case, you can use a technique called Shape Hints to encourage the tween to proceed as you wish.
- shsMorph.swfClick the link at the right to see an example of this animation.
- Create a new Flash 3.0 document. Select a thelightest gray as the Background Color for the stage, then save in your Project 1 folder as lastname shsMorph.fla.
- Create the Text:
- Click the Text tool. Select a bold, solid sans-serif font for the text, a red color, and a font size of 250-300.
- Type GO SHS on the Stage, in all caps.
- Convert the Text Object to Shapes and place on Different Layers:
- Use the selection tool to select the text object, right-click and choose Break Apart twice.
The letters are now mesh shapes that can be used in a shape tween.
- With all the mesh letters selected, right-click and choose Distribute to Layers, and delete the empty layer.
The 'G' should now be in the top layer.
-
Prepare for Tweening
- Hide all but one letter. Select the visible letter and use the Align panel to center the letter horizontally and vertically on the Stage.
- Repeat with the remaining letters.
- Create the Shape Tweens:
- On the layer with the G, insert a keyframe in 15.
- Insert a blank keyframe in frame 30.
- Select the O and cut it from its layer. Paste it in place in frame 30 of the first layer.
- Insert a keyframe in frame 36.
- Insert a blank keyframe in frame 50.
- Select the first S and cut it from its layer. Paste it in place in frame 50 of the first layer.
- Insert a keyframe in frame 56.
- Continue in the same manner, placing the H and the second S with the same pattern of frames with tweens between different letters and blank frames between identical letters.
- Change the O in frames 30 and 36 to black. Repeat for the second S in frames 90 and 96.
- Change the first S, in frames 50 and 56 to a darker silver than the background.
- Add a blank keyframe in frame 110 and copy the G to that frame.
- Add blank frames to frame 115.
- Delete the empty layers.
- Test the movie
- Add Shape tweens
- In each long interval, beginning with frame 15, add a shape tween.
- Test the movie.
- Add Shape Hints to improve shape tweening.
- You should not add more than 2-4 hints.
- If the hint placement makes the letters disappear, you will have to adjust their placements.
- Drag the playhead back and forth as you work, to check the tween with the Shape Hints in place.
- Make the letter morphs as smooth as you can.
- Test the movie - all the shapes should move smoothly from one to the next, looping to repeat.
- Make any adjustments you feel are needed, then save your work, publish to export the swf file, then close.
Task 5 - Working with a Movie Clip
- Start a new Flash movie and save it in your Project 1 folder as lastname myFlyer.fla.
- Create a Graphic Symbol:
- Create a new graphic symbol and name it flyer.
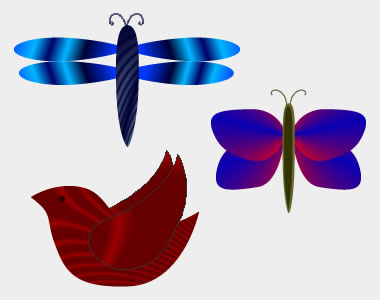
- In the blank symbol editing screen, create a simple graphic of a flying bug, butterfly, dragonfly, simple bird or some other creature that can fly.
- Be sure to use layers to create the different parts of your flyer, especially placing any 'movable parts', like the wings, tail, etc, on a separate layer or layers.
- Create a Movie Clip Symbol:
- Create a new movie clip symbol and name it flyer_mc.
- Drag your flyer onto the movie clip timeline.
- Create an appropriate animation to make your flyer move its wings and any other parts, as it would while flying. (ask about easy ways to do this...)
- Create a background environment:
- Return to the main timeline.
- Based on the type of flyer you have created, plan background layer of some kind.
- You may find and choose a bitmap background, or you could draw a simple 'cartoon' background.
- Be sure you include something in the background that your flyer could 'interact' with, like a place to land, for example.
- Use the Movie Clip on the main timeline:
- Drag an instance of your Movie clip onto the stage.
- Create a motion tween to make the flyer move onto the stage in one location, and exit the stage in another location.
- Edit the path so that it flies a double-curved path between its entrance and exit.
- Orient the flyer to its path.
- Add More instances:
- Add at least two more instances of your movie clip, each on its own layer.
- Make a change of properties to each, so they are different in some way from the original.
- For one of the new instances, create a classic tween with a Motion Guide to control its path - making the path cross itself at least once.
- For the third or subsequent instances, make them fly on the screen in any way you wish.
- Be sure to orient your flyers to their paths.
- Finish the animation:
- Name your layers appropriately to describe their purpose.
- Preview your movie to make sure that it works as you wish.
- When you are satisfied, save and publish.
Zip your Project 1 folder (In My Computer, right-click folder and choose Send to... Compressed file). Copy your zipped folder to your Turn-in folder in the common drive.
|

