![]()
Lesson Practice 6-1: Styling Images

Task 1 - Controlling Image Dimensions and Border
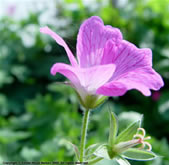
- Right click on each of the three images at the right and save them
into your images folder of your HTML Practice site.
- Open a nocss.htm in Notepad++. Immediately Save the file in
your CSS folder as image1.htm.
- In the title element, add the title: Controlling
Image Dimensions and Border
- Add h2 header to the top of the page with the same text
as in the title.
- Add the image flower1.jpg at the beginning of the first
paragraph.
- Add the image flower2.jpg at the beginning of the second
paragraph.
 Add a new paragraph on a new line after the
last paragaph. Add the image button_home.jpg to the paragraph, followed
by the text: Click here to go to the home page.
- Link the picture and text together to your index page.
- Preview the page to make sure the images are displaying properly
and the link works.
- Add an embedded style sheet.
- Create a .center class that centers text.
- Create a class named .pic1 and add declarations to make the height
100 px and the
width 140 px.
- Create a class named .pic2 and add a declaration(s) to add a 3 pixels
wide border with ridge style, and darkgreen color.
- Create a class named .button and add a declaration to remove the
border.
 Apply the center class to the h2 element and to the last paragraph,
containing the link image.
- Apply the pic1 class to the first image, the pic2 class to the second
image and the button class to the third image.
- Preview the file to see the effects. If any property does not work,
trouble-shoot to fix it.
- Save the file again.
Task 2 - Image Alignment and Text Wrapping
- Open a image1.htm in Notepad++. Immediately Save the file in
your CSS folder as image2.htm.
- In the title element, add the title: Image Alignment
and Text Wrapping
- Change the h2 header at the top of the page to the same text as in
the title.
- To the pic1 class add a declaration to make the object float to
the left.
- To the pic2 class add a declaration to make the object
float to the right.
- To the button class add a declaration to make the vertical
alignment middle.
- Preview the file to see the effects. If any property does not work,
trouble-shoot to fix it.
- Save the file again.
Task 3 - Using the Clear Property
- Reopen image2.htm if needed in Notepad++. Immediately Save the
file in your CSS folder as image3.htm.
- In the title element, add the title: Using the
Clear Property
- Change the title heading to match the title element.
- Create a class named .nowrap and add a declaration to set the clear
property to right.
- Apply the nowrap class to the third h3.
- Preview the file to see the effects. If any property does not work,
trouble-shoot to fix it.
- Save the file again.
Task 4 - Contolling Image Spacing
- Open image3.htm in Notepad++. Immediately Save the file in your
CSS folder as image4.htm.
- In the title element, add the title: Controlling
Image Spacing
- Change the title heading to match the title element.
- To the pic1 class add declarations to make the margin 10 pixels
on the right and bottom.
- To the pic2 class add declarations to make the margin 10 pixels on the left and bottom.
- To the button class, add 5 pixels of space on the right. (find out if padding or margin is correct to choose by trying both.)
- Preview the file to see the effects. Trouble-shoot as needed.
- Save the file again.
Task 5 - Adding Box Practice Links to Index Page
- Open your external style sheet.
- To the dt rule, add a declaration to make 10 pixes of padding on
the left.
- Create a rule for the td element that aligns the cell contents at
the top of the cell.
- Save the style sheet and close.
- Open your index.htm file.
- Preview to see that the terms are now spaced a bit to the right in
the background image.
- Add CSS Box Properties as a new term in the list.
- Add the titles of all your box, and image files as definitions.
- Link the titles to their appropriate files.
- Add the table files to your table category.
- Test your links, save the file and publish the new files (including the edited index page and the three new images).